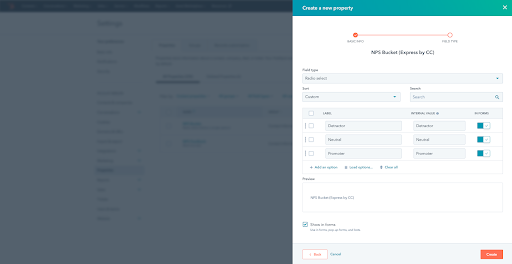
Create Custom Property: NPS Bucket
- In your HubSpot portal, go to your Settings by clicking on the cogwheel in the top left.
- On the left side, click on Properties. Then click on Create property (orange button).
- Set Object type to “Contact” and set Group to “Contact information”.
- In the Label field, put in “NPS Bucket”. You can leave Description blank. Click Next.
- Set the Field type to “Radio select”. Leave the Sort field as “Custom”.
- Add the following three options under the Label section in the Enter label field.
- Ensure that the Show in forms box is checked. Then click on Create.
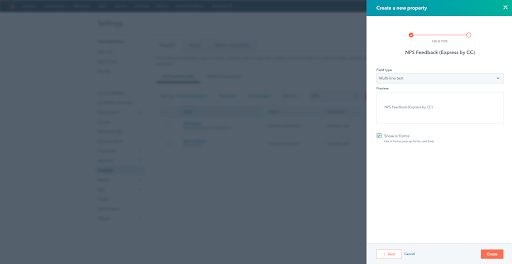
Create Second Custom Property: NPS Feedback
- In your HubSpot portal, go to your Settings by clicking on the cogwheel in the top left.
- On the left side, click on Properties. Then click on Create property (orange button).
- Set Object type to “Contact” and set Group to “Contact information”.
- In the Label field, put in “NPS Feedback”.
- Add a description to distinguish between this property and the other. Add something, such as “Feedback explaining the reason for the NPS score they gave.” Click Next.
- Set the Field type to “Multi-line text”. Leave the Sort field as “Custom”.
- Ensure that the Show in forms box is checked. Then click on Create.
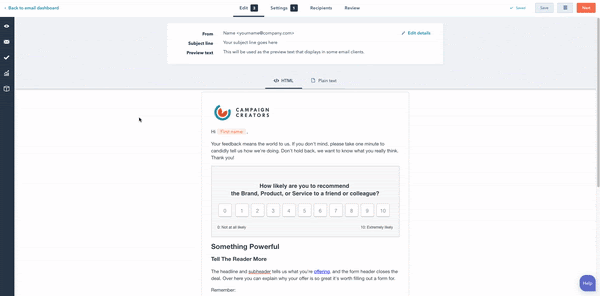
How to Use and Edit New Email Template/Modules
- Hover over the module that you would like to edit and click. Alternatively, you can also click the cube icon on the left side to access a list of modules to edit.
- A panel will appear on the left listing the different elements you can customize, such as images, copy, text, color and more!
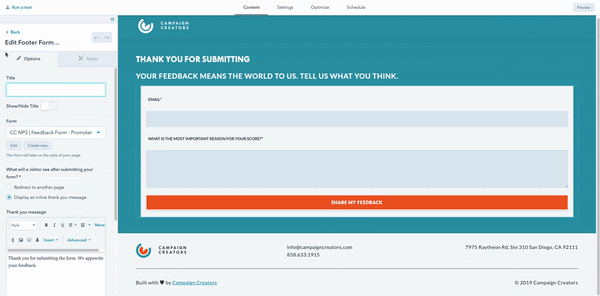
How to Use and Edit New Landing Pages
- Hover over the module that you would like to edit and click. Alternatively, you can also click the cube icon on the left side to access a list of modules to edit.
- A panel will appear on the left listing the different elements you can customize, such as images, copy, text, color and more!
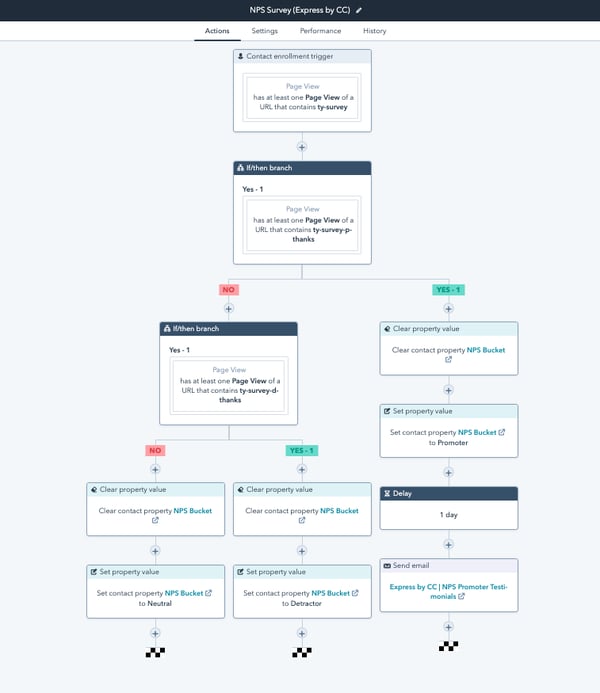
This is How Your Workflow Should Look
- Make sure you’ve customized your new landing pages and email templates.
- Turn the workflow on and send your your first survey email!
Have additional questions? Email us at support@campaignwizard.io.
/customer-feedback-illustration.png?width=400&height=330&name=customer-feedback-illustration.png)